

Master Localization in OpenHarmony: Adding RTL Language Support
Step-by-Step Guide to Localizing Your OpenHarmony App with RTL and Multilingual Features for a Global Audience


Localization is crucial for making apps accessible globally. Supporting right-to-left (RTL) languages like Arabic and Hebrew requires adjustments beyond translation, including proper text alignment, UI mirroring, and navigation adaptation.
In this article, we will cover the following topics:
How to add a new language
How to add translations for the new language
Learn about preferred and system language settings
How to change the language
By the end of this article, you will have a solid understanding of how to effectively localize your OpenHarmony app, making it ready for users across different regions and languages.
Add a new Language
Let's start by adding a new language to our app. In this example, we will add Farsi/Persian, a right-to-left language, to demonstrate how to handle RTL support effectively. Adding a new language in DevEco Studio is straightforward, so just follow these steps:
Open your project in DevEco Studio.
Go to your 'entry' section, right-click on the 'resources' directory, and choose New > Resources Directory.

In the New Resources Directory dialog, on the left side under 'Available Qualifiers', choose 'Locale' options and click the '>' button.
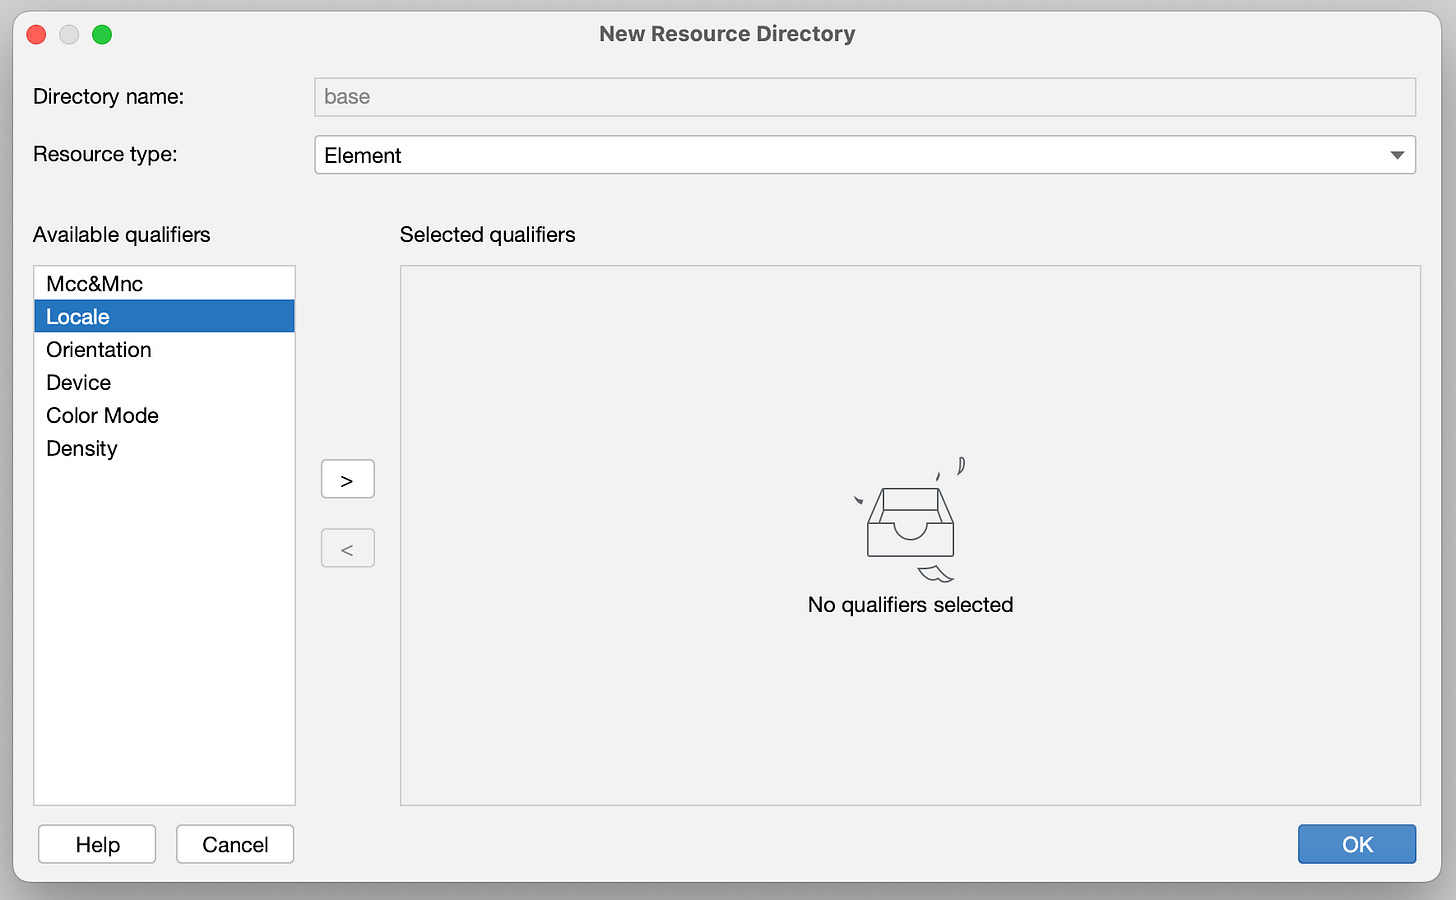
Now, you can select your language and region. We will select 'fa: Persian' as our language and choose any region, then click 'OK'.

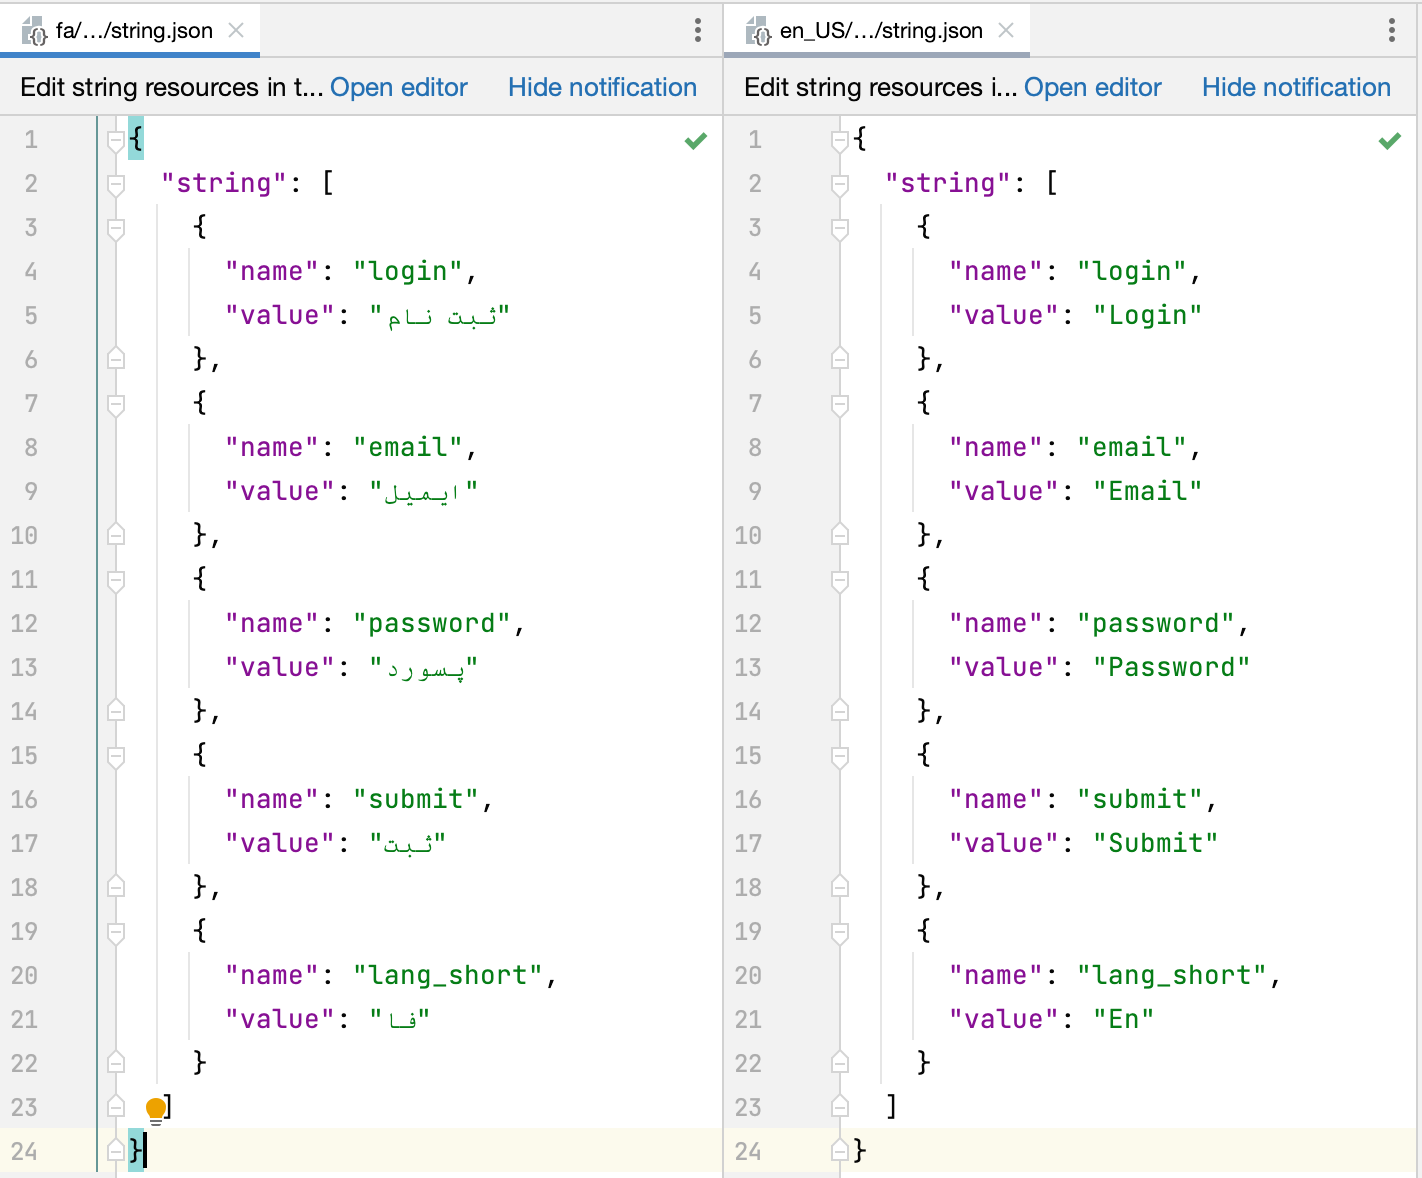
Nice! Now you can see the 'fa' folder created in the resources directory. It's time to create your
strings.jsonfile to add your localizations. You can either create a newstrings.jsonfile or copy the one you have in other locales, like English.Open your
strings.jsonfile in the 'fa' folder and translate the content accordingly.


Our localization files look like this:
Great job! In the next section, we'll cover preferred and system language settings to help you manage language preferences effectively. This will help you understand how OpenHarmony manages language preferences and how to adapt your app for different user settings.
Preferred Language Setting
The Preferred Language Setting in OpenHarmony lets users choose a specific language for each app, which is especially helpful for multilingual users. For example, a user can set the system language to Chinese but prefer an app in English. This ensures the app launches in the preferred language, providing a more personalized experience.
To work with the preferred language in OpenHarmony, start by adding the i18n package:
import I18n from '@ohos.i18n';For our example, we want to get the current preferred language of our app:
let preferredLanguage = I18n.System.getAppPreferredLanguage();To see all possible preferred languages:
let allPreferredLanguages = I18n.System.getPreferredLanguageList();And If you want to update the preferred language, you can use the following code:
I18n.System.setAppPreferredLanguage('your-language');Alright, now that we know the basics, let's make a simple login page and use our knowledge to make it multilingual and see how it behaves.
Change the App Language
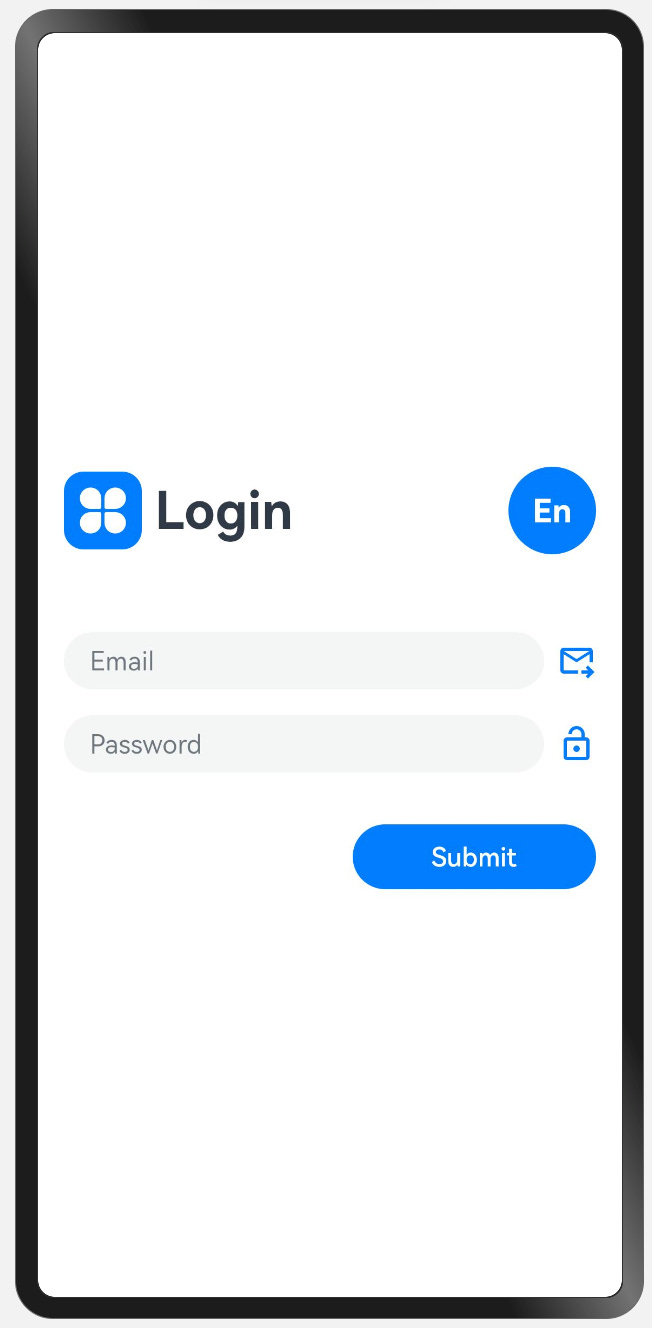
I made this simple login page to make our example more realistic. This login page has two input fields and a button that helps you update your language.
This is the code for our language button:
Button(){
  Text($r('app.string.lang_short'))
    .fontSize(20)
    .fontWeight(FontWeight.Bold)
    .fontColor(Color.White)
}
.width(54)
.height(54)
.onClick(() => {
  this.setLanguage();
})
The code provided defines a button for updating the app's language in a simple login page.
As you can see, we also have a method called setLanguage(). In this part, we are doing the business logic for changing the language.
Here is the code for the setLanguage() method:
setLanguage() {
  try {
    let preferredLanguage = I18n.System.getAppPreferredLanguage();

    I18n.System.setAppPreferredLanguage(preferredLanguage == 'fa' ? 'en' : 'fa');
  } catch (error) {
    let err = error as BusinessError;
    console.error(`call System.setAppPreferredLanguage failed, error code: ${err.code}, message: ${err.message}.`);
  }
}
This method first retrieves the current preferred language of the app. If the current language is Farsi ('fa'), it switches to English ('en'), and vice versa. If any errors occur during this process, they are caught and logged to the console for debugging purposes. This ensures that users can easily toggle between languages using the button provided.
And The result is like this:
Awesome! As you can see, with minimal effort, the framework effectively handles language switching. It manages text changes and adjusts the layout seamlessly, all with smooth animations that make the user experience enjoyable.
This is our full code app:
import I18n from '@ohos.i18n';
import { BusinessError } from '@ohos.base';

@Entry
@Component
struct Index {
  build() {
    Column() {
      Row() {
        Image($r('app.media.startIcon'))
          .width(48)
          .height(48)

        Blank(8)

        Text($r('app.string.login'))
          .fontSize(32)
          .fontWeight(FontWeight.Bold)
          .layoutWeight(1)

        Button(){
          Text($r('app.string.lang_short'))
            .fontSize(20)
            .fontWeight(FontWeight.Bold)
            .fontColor(Color.White)
        }
        .width(54)
        .height(54)
        .onClick(() => {
          this.setLanguage();
        })
      }
      .margin({ right: 16, left: 16, top: 16, bottom: 32 })

      Row() {
        TextInput({ placeholder: $r('app.string.email') })
          .layoutWeight(1)
        Blank(8)
        Image($r("app.media.email"))
          .width(24)
      }
      .margin({ right: 16, left: 16, top: 16 })

      Row() {
        TextInput({ placeholder: $r('app.string.password') })
          .layoutWeight(1)
        Blank(8)
        Image($r("app.media.pass"))
          .width(24)

      }
      .margin({ right: 16, left: 16, top: 16 })

      Button($r('app.string.submit'))
        .width(150)
        .alignSelf(ItemAlign.End)
        .margin({ right: 16, left: 16, top: 32 })

    }
    .justifyContent(FlexAlign.Center)
    .alignItems(HorizontalAlign.Start)
    .width('100%')
    .height('100%')
  }

  setLanguage() {
    try {
      let preferredLanguage = I18n.System.getAppPreferredLanguage();
      I18n.System.setAppPreferredLanguage(preferredLanguage == 'fa' ? 'en' : 'fa');
    } catch (error) {
      let err: BusinessError = error as BusinessError;
      console.error(`call System.setAppPreferredLanguage failed, error code: ${err.code}, message: ${err.message}.`);
    }
  }
}
Bonus Tips
We've come a long way, learning the basics of supporting multiple languages and ensuring RTL language compatibility. In this section, I'll share some helpful tips that will make developing your multilingual app even easier.
Use 'start' and 'end'
Whenever possible, use 'start' and 'end' instead of explicitly setting 'left' and 'right'. If the API allows you to define properties like alignment or padding as 'start', use that instead of 'right'. This approach ensures that your code works seamlessly for both RTL and LTR languages.
Set the Directionality Manually
In some cases, you may need to explicitly set the text direction to RTL or LTR for specific layouts. All components in OpenHarmony have a direction method that allows you to manually set the direction. For example:
Column() {
  Text('Some Text')
}
.direction(Direction.Rtl)
This ensures that the layout properly respects the RTL or LTR settings, providing a consistent user experience across different languages.
Use Application State Management to Keep Language Settings
States like language settings or theme information are better kept in application states such as AppStorage or PersistentStorage. These storage options represent global states, ensuring that settings like language preference are accessible from every page of your app. This makes it easier to maintain consistency throughout your application.
Conclusion
In this article, we've covered the essentials of localization in OpenHarmony, including adding new languages, managing RTL languages, and effectively using the framework's tools for seamless multilingual support. By applying these best practices, you can create a user-friendly, accessible app that caters to a diverse, global audience. Keep experimenting and refining your approach to localization, and your users will appreciate the attention to detail and thoughtful experience you provide.